Mastering Digital Romance: A Practical Guide to Watercolor Heart Brush Stamps Procreate
Digital art offers incredible freedom, but it also presents a unique set of challenges when trying to replicate the organic feel of traditional media. Many creators jump straight into downloading assets like Watercolor Heart Brush Stamps Procreate without fully understanding how to integrate them effectively into their workflow. While these tools promise instant beauty for cards, bullet journals, and social media graphics, using them incorrectly can lead to repetitive, flat-looking designs that fail to engage your audience. The goal isn't just to stamp an image onto a canvas; it is to create a cohesive piece of art that feels intentional and professional.
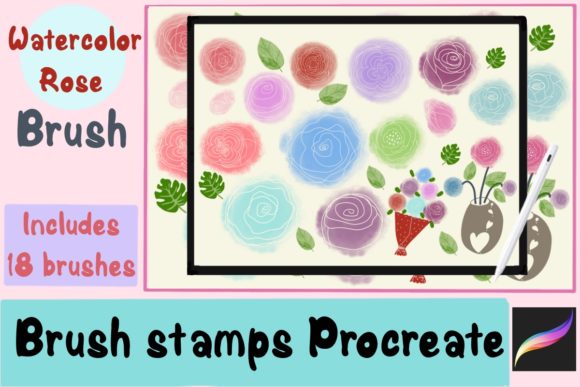
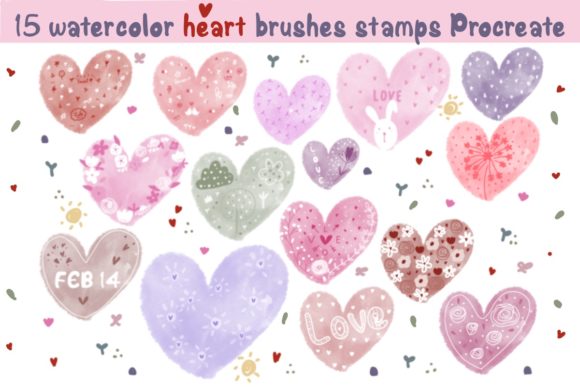
When you purchase a set of 15 Watercolor heart brush stamps Procreate Brushes, you are investing in versatility. However, a common misconception among beginners and seasoned professionals alike is that high-quality brushes automatically equal high-quality art. This is rarely the case. The difference between a generic Instagram post and a standout brand asset often lies in how the artist manipulates the tool, not the tool itself. By understanding the nuances of these digital stamps, you can avoid the trap of creating content that looks "stock" or disjointed.
The Trap of Over-Reliance on Default Settings
One of the most frequent mistakes creators make immediately after importing their new brushes is using them at 100% opacity with no adjustments. When you tap to stamp a watercolor heart, the default setting often lays down a solid, uniform color. In traditional watercolor painting, transparency and layering are what create depth and realism. If every heart in your wreath or pattern looks identical and opaque, the final composition will feel heavy and artificial.
To correct this, you must treat the brush settings as a starting point, not a rule. Before you begin your actual artwork, open a test layer and experiment with the opacity slider and flow. Try stamping a heart at 60% opacity, then overlapping another slightly offset heart at 40%. This mimics the way wet paint interacts on paper, allowing underlying colors to show through. For entrepreneurs designing wedding invitations or marketers creating Valentine's Day campaigns, this subtle adjustment elevates the perceived value of the design. It signals attention to detail rather than a quick copy-paste job.
Ignoring Color Harmony and Context
Another overlooked detail is the color selection process. Many users select the default black or a harsh primary red from the palette because it is convenient. While the texture of the Watercolor Heart Brush Stamps Procreate might be exquisite, a clashing or dull color choice can ruin the entire aesthetic. Watercolor relies heavily on the interplay of hues; a heart that is too saturated can dominate a delicate bullet journal spread, while one that is too muted might disappear on a dark background.
A better approach involves building a custom palette before you start stamping. Consider the mood of your project. Are you designing a soft, romantic card for a client, or a bold graphic for a sale announcement? Use the color picker tool to sample shades from reference images or create a limited palette of three to four complementary tones. Apply these colors to your heart stamps variably. For instance, use a deep crimson for the focal points of a wreath and a washed-out pink for the background elements. This variation creates visual rhythm and guides the viewer's eye through your composition naturally.
Misunderstanding Layer Management
Digital art provides the distinct advantage of non-destructive editing, yet many artists neglect proper layer management. A frequent error is stamping all fifteen hearts from the set onto a single layer. Once those stamps are down, you lose the ability to move, resize, or recolor individual elements without affecting the whole group. This becomes a significant headache if you realize halfway through that one heart is covering text in your digital planner or disrupting the balance of your artwork.
The professional standard is to work with organized layers. Create a dedicated folder for your heart elements. Ideally, stamp larger or focal hearts on their own layers, while grouping smaller decorative stamps together. This structure allows you to tweak the position of specific elements to perfect the spacing in your wreath or border. Furthermore, utilizing blending modes like Multiply or Overlay on separate layers can enhance the watercolor effect, making the colors blend more naturally with the background texture of your canvas.
Scale and Resolution Pitfalls
When preparing files for different outputs, such as a high-resolution print versus a compressed Instagram story, scale matters immensely. A common oversight occurs when artists design at a small canvas size and then attempt to enlarge the image for print later. This results in pixelated edges that destroy the soft, fluid look of the watercolor texture. Conversely, designing at a massive resolution for a simple web graphic can slow down your device unnecessarily.
Always define your end goal before you import your Procreate Brush stamps. If you are creating physical products like greeting cards or merchandise, start with a canvas size of at least 300 DPI. For digital-only use, 72 DPI is sufficient, but working at a higher resolution initially gives you more flexibility. Remember that these brush stamps are vector-like in their utility but raster-based in nature; shrinking them is safe, but enlarging them beyond their original creation size will degrade quality. Plan your layout dimensions first to ensure crisp, clean lines regardless of where your art ends up.
Neglecting the "Human" Element
Finally, there is a tendency to seek perfection in digital stamping, which ironically makes the art look less authentic. Traditional watercolor is prized for its imperfections—bleeds, uneven edges, and varied saturation. When users try to align every Watercolor Heart Brush Stamps Procreate element perfectly symmetrically, the result can feel sterile and robotic.
Embrace the organic nature of the medium. Rotate your hearts slightly at random angles rather than keeping them all upright. Vary the size of the stamps within the set to create a dynamic flow. If you are decorating a bullet journal page, let some hearts overlap the lines of your handwriting slightly to create a sense of depth and integration. These small "imperfections" add character and warmth, making the artwork feel hand-crafted rather than computer-generated. This approach resonates more deeply with audiences who value authenticity in branding and personal expression.
Before finalizing any project, take a step back and review your work with a critical eye. Ask yourself if the hearts serve the composition or if they are merely decoration. Ensure that your file organization is sound for future edits and that your color choices support the emotional tone of the piece. By avoiding these common pitfalls and applying a thoughtful, layered approach, you transform a simple digital download into a powerful creative asset. Whether you are a freelancer delivering client work or a hobbyist documenting your journey, mastering these details ensures your art stands out in a crowded digital landscape.